The first version on the upgrade with the smaller motor would work but it didn’t have the torque I thought it should have. So…
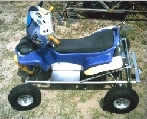
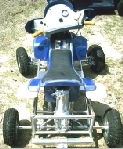
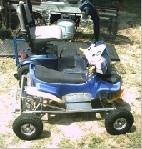
I have now rebuilt it using an under carriage built from tubing that looks like a go-kart without the plastic quad body intalled. It was built this way so when my nephew gets tired of the quad runner, my brother can remove the plastic body and mount a go-cart seat on the frame instead. A couple of braces to hold the stearing bar and it would be done.
This time the drive unit is an electric motor and gearbox from a wheelchair. It is a 500 watt 24 volt motor. The original two motors that came in the qaud-runner were 33 watt 12 volt motors. So it now has about 7 times as much horse power to work with.
Before you wonder just how fast this little quad will go let me tell you now that this is not a speed machine, it will only go about
1-2 mph faster than the original motor drive setup. (about 6 mph on a flat surface full speed) The big difference is how much torque it has and how much load it can pull. Both back wheels are fixed to the axle so it drives both and has no trouble whatsoever spinning both rear wheels on any surface including pavement. Due to the the weight distribution of the batteries it will not pull a wheelie at all and that done on purpose for safety reasons.
The wheel base is also set up on a 30X30″ square with a very low center of gravity. It will proably climb a 45% hill with no problems and is very unlikely to ever turn over. We tested my small bike trailer with me in it (230 lbs together) being pulled with my nephew driving and the quad pulled me around the backyard without a problem, even through a soft sandy patch. My trailer has 12″ scooter wheels on it and did sink in the sand somewhat as we where going but the quad just kept right on pulling it!
I was actually rather inpressed with it’s capabilities.
As mentioned above, it uses a wheelchair motor controlled by a 500watt fully adjustable speed type scooter controller and two
SPDT heavy duty relays that are used together to give reverse. I used the two original switches in the stickshift control to control the brake function of the controller and to operate the reverse relays. It now has the three postions that were used before but now it has ‘forward’, ‘park’, and ‘reverse’ instead of fast, slow and reverse. In ‘park’ the controller is shut off by using the brake control input.
This quad does not have any actual brakes but is controlled completely through the motor drive. Because the drive uses a worm and wheel gear setup the quad will not roll very easily when not under power. It doesn’t need brakes , just let off the power control and stops. By flipping the stickshift into park it turns the controller off and stops almost instantly. The drive can also be also be disengaged so it can be pushed or pulled easily if needed.
A scooter voltage indicator is mounted in the fairing where a paper sticker fuel gage was at. The on/off switch is mounted where the fake key switch was at. I extended the battery box to hold two 12 v lead acid batteries instead of one. The extension is made of sheet metal and is riveted both to the plastic body and the metal footboard. Below are some picture of what is looks like now. Just click any picture for a larger view.
|
Close up of drive |
Size comparison views |
|
One |


